


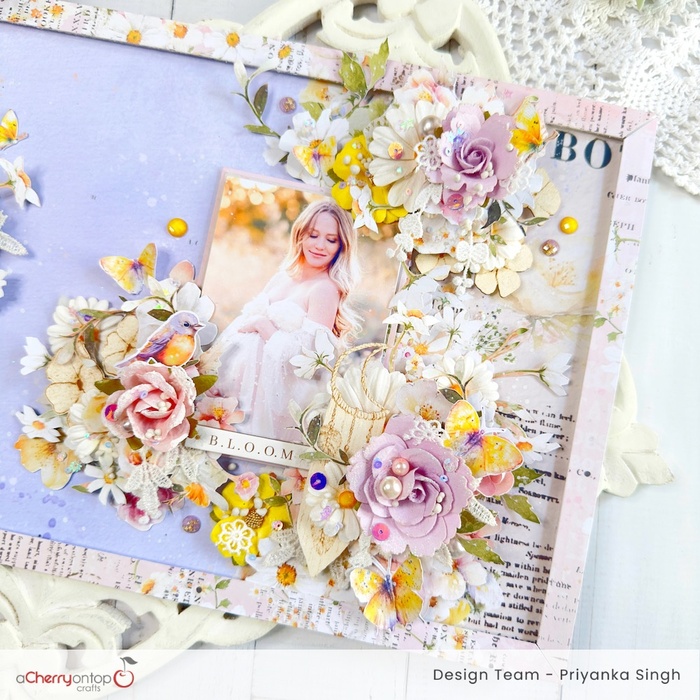
In Full Bloom Scrapbook Layout
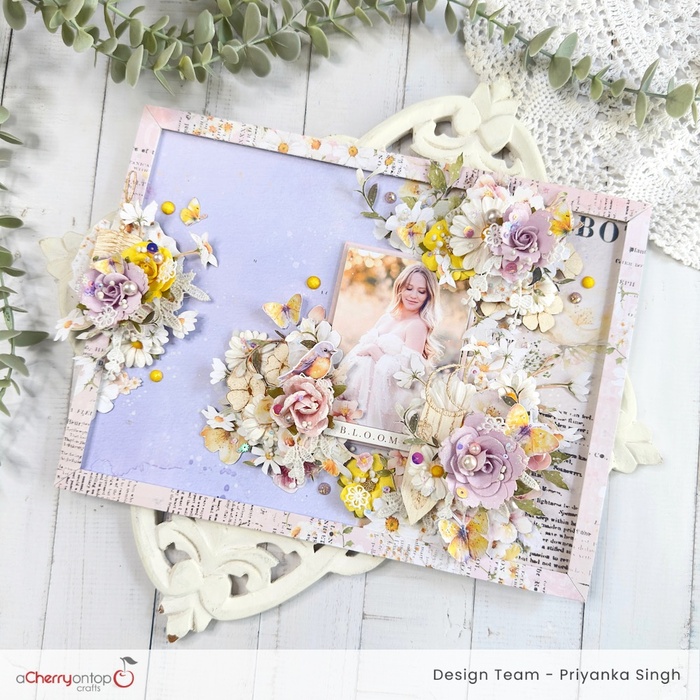
Hello, crafting enthusiasts! Today, I'm excited to share a step-by-step guide on creating a stunning floral layout using the "In Full Bloom" collection by Prima Marketing Inc. This collection is a treasure trove of beautiful floral elements and papers that are perfect for creating a vibrant and eye-catching layout. Let's dive right into the process!
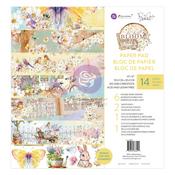
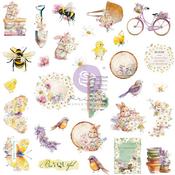
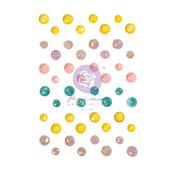
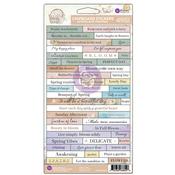
**Materials Needed:**
- Patterned papers from the "In Full Bloom" collection
- Focal photo
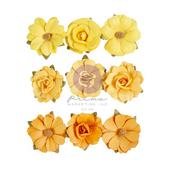
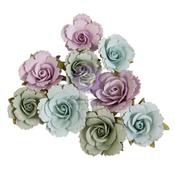
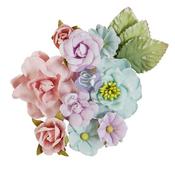
- Floral elements and flowers from the collection
- Chipboard pieces
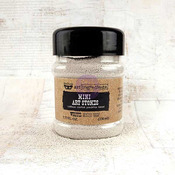
- Crystals, art stones, and sequins in shades of violet
**Step 1: Prepare the Base**
Start by taking a piece of heavy cardstock as your base. Adhere a coordinating patterned paper from the "In Full Bloom" collection onto the cardstock to create a beautiful background for your layout.
**Step 2: Create the Frame**
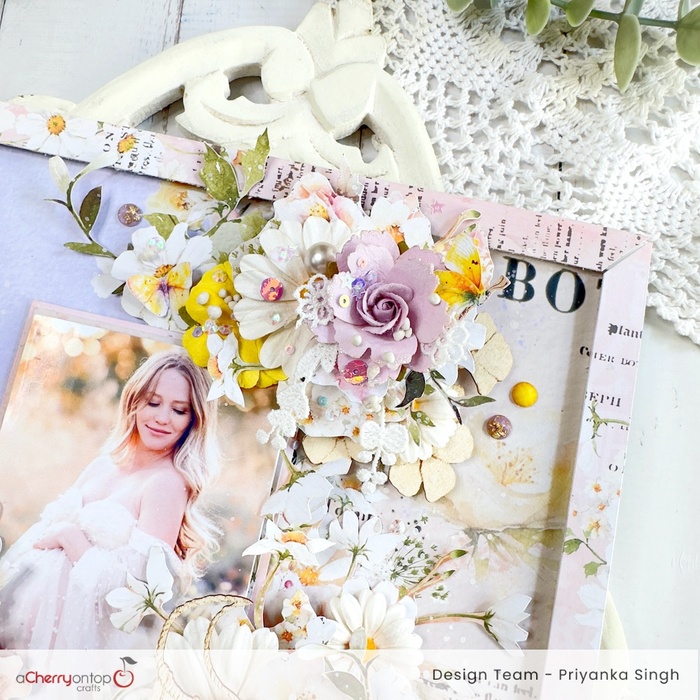
Next, select another patterned paper from the collection and cut it to create borders. Adhere to these borders at a certain height on the layout to frame your design and add visual interest.
**Step 3: Arrange the Floral Elements**
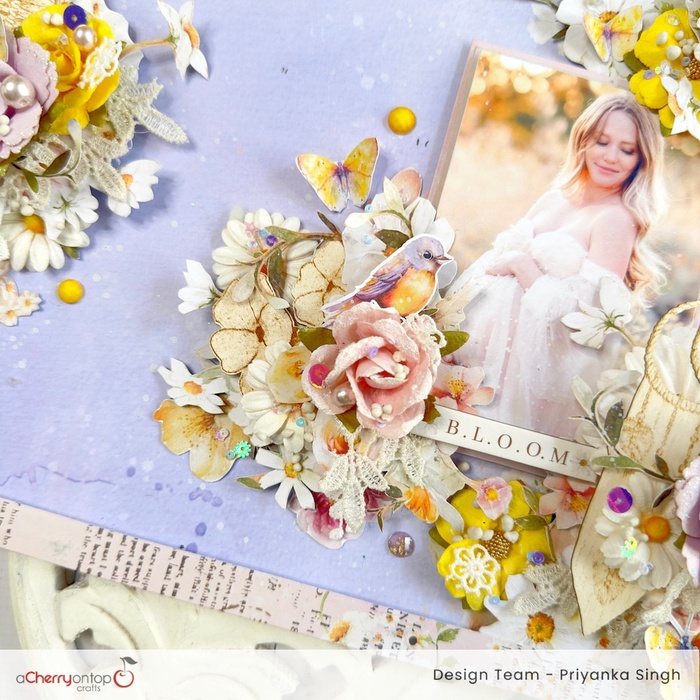
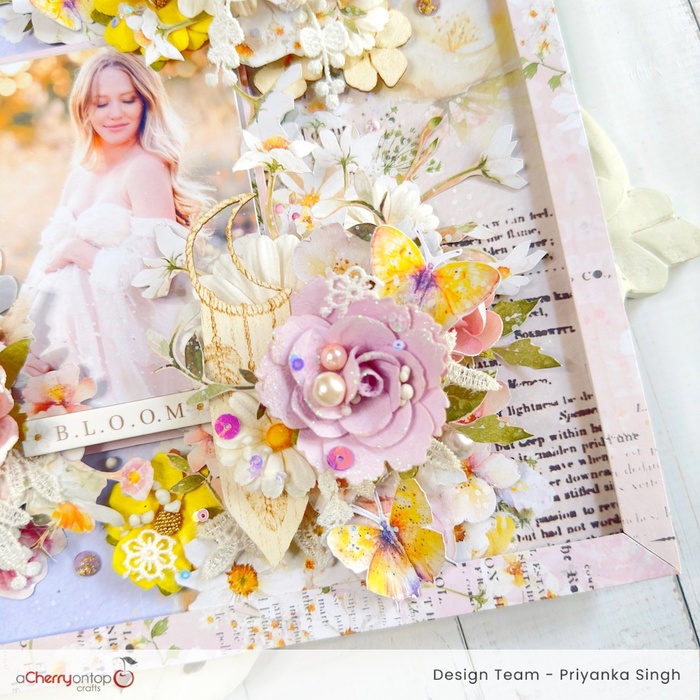
Choose a striking photo as your focal point for the layout. Begin arranging the floral elements and flowers from the "In Full Bloom" collection around the photo, creating a harmonious and balanced composition. Play around with the placement until you are satisfied with the arrangement.
**Step 4: Add Depth with Chipboard**
To add more dimension and depth to your floral arrangement, incorporate some chipboard pieces from the collection. Place them strategically among the floral elements to enhance the overall look of the layout.
**Step 5: Final Embellishments**
To finish off the layout, embellish it with pearls, art stones, and sequins in shades of violet. These subtle touches will add sparkle and texture to your design, making it truly stand out.
And there you have it! Your floral layout featuring the "In Full Bloom" collection by Prima Marketing Inc is now complete and ready to be showcased. This project is a perfect way to celebrate the beauty of spring and capture precious memories stunningly and creatively.
Happy crafting!
Products Used:
 Priyanka Singh
My name is Priyanka, It has been 6 years of officially working full-time as a paper artist through my home studio in Gurgaon, India. I have always been very passionate about learning and trying new kinds of arts and papercrafts. Since childhood, I just loved to give my friends and family something handmade of my own. I never imagined after having an engineering degree and doing my master's in business, I would still choose to be a creative person as a career for myself. I am just head over heels in love with what I do and very very passionate to take it further, it has helped me enhance my personality to be a better person in life for myself as well as others. I love to try out new kinds of layouts, projects, scrapbooking, and mixed media arts. I also take workshops, and online classes to share my knowledge with anyone keen on exploring their creative side.
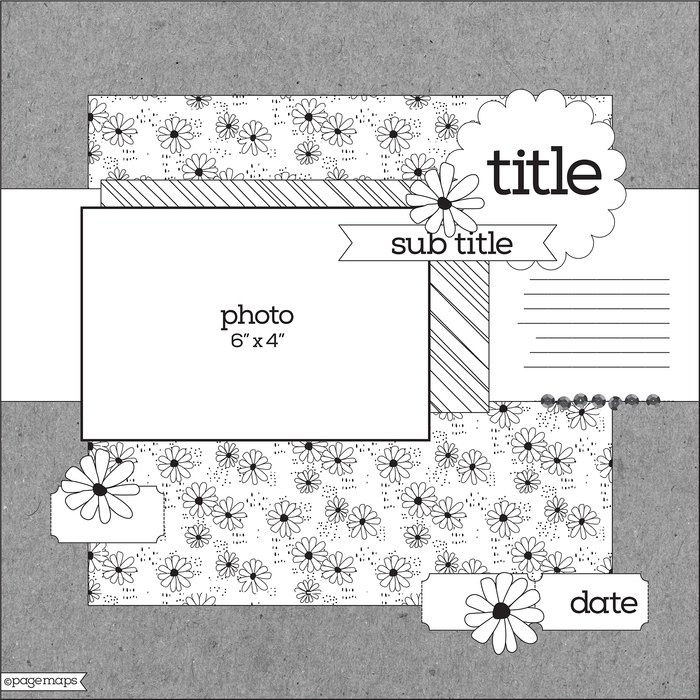
Weekly Sketch Challenge 375
Need some inspiration for your scrapbooking? Every week we post a brand new sketch challenge for you! Here is this week's sketch challenge, and read below how you can earn Cherry Points.
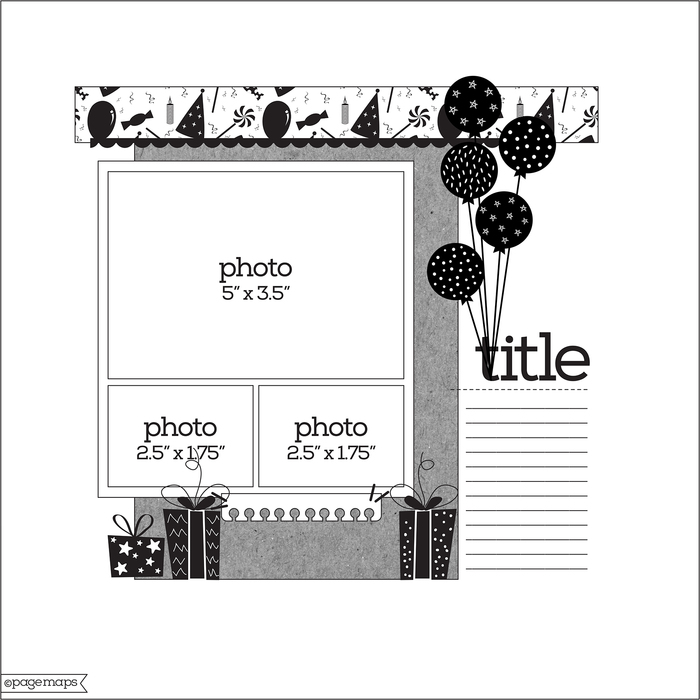
Post your finished project (scrapbook layout, card, art journal, etc.) on the Sketch Challenge 375 Project Gallery. One random winner will be awarded 1000 Cherry Points, while all other participants will receive 100 points. You have until midnight (11:59 pm EST) Wednesday, May 1st 2024, to post your project. See Terms & Conditions.
Don't forget to visit our Contests & Challenges forum on our Message Board for even more inspiration!
Last week's Sketch Challenge winner is GinniG -- congrats!
Becky Moore is the founder of PageMaps.com, a free resource that provides distinct, original page and card sketches that help papercrafters spend less time planning their pages and more time scrapping them. Becky is also the Art Director at Photoplay Paper, where she designs scrapbook collections, stamps, and other embellishments. You can find many more of her sketches by visiting www.pagemaps.com.
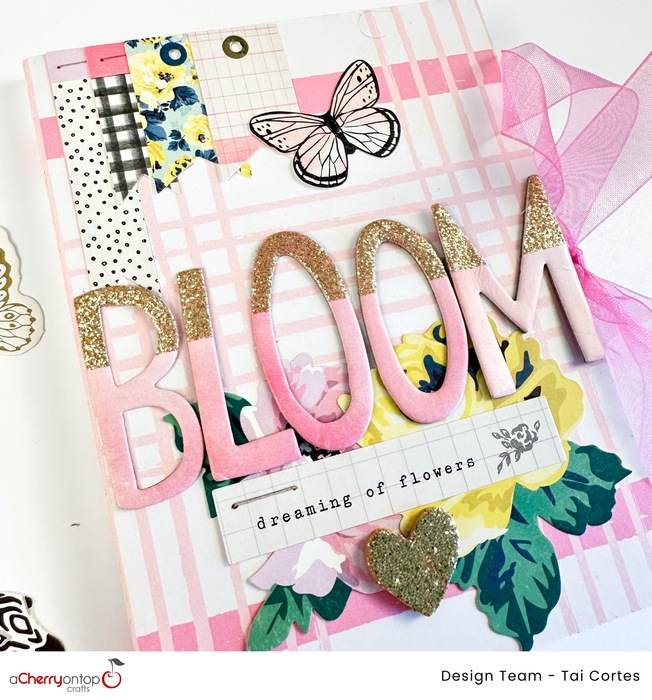
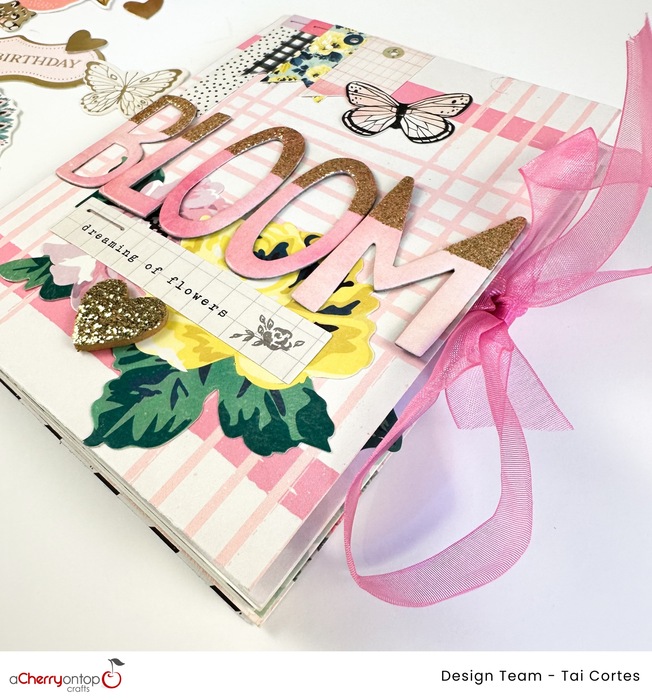
Making An Album Out Of A Card Kit
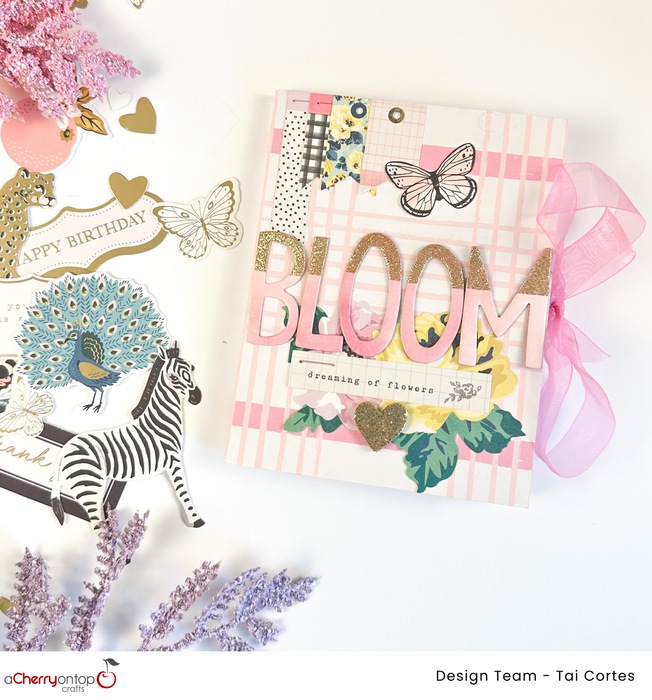
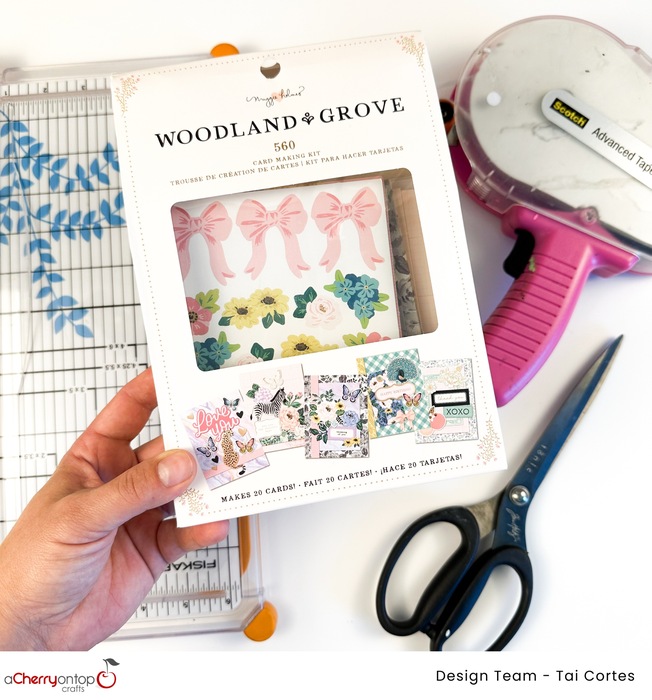
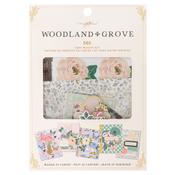
Hello, my crafty friends! It's Tai and I am here today with a mini-album project. I used the Woodland and Groove card kit from Maggie Holmes. The kit comes with 20 cards and envelopes, die cuts, stickers, and washi tape. The packaging gives examples of how to decorate a few cards with the kit. All the layers and suggestions I used to make my creating session go smoother.
The kit includes 4 of each of the 5 designs. You can decide how many you would like to use and how thick you would like to make yours. For me, and this project, I simply select one of each so it will be 5 cards thick.
To begin, take each of the cards and bend them in the opposite direction. Do not make any new creases, just bend backward so that the design of the card is now on the inside instead of the outside. Once you have done this step, select the order you would like the designs.
Line up all the spines together and use double-sided tape to adhere the blank white sides together. Once this step is complete, it should be able to flip like a mini book. You can leave it as so, or you can select a patterned paper to make a book cover.
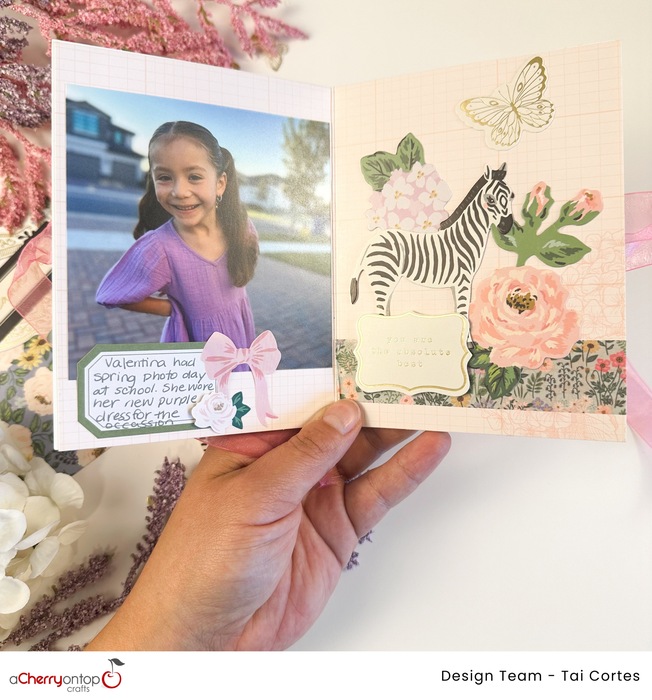
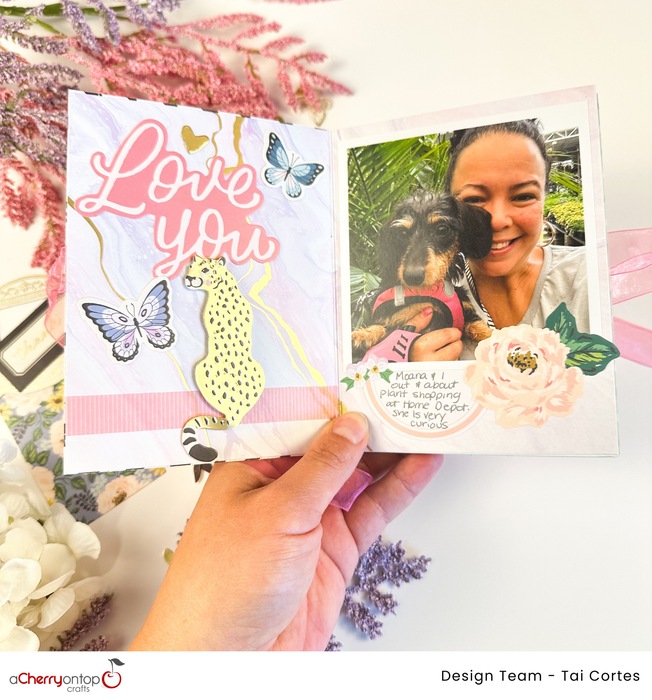
The pink plaid paper is from Maggie Holmes so the colors work well with the collection. I made sure to score the paper with a .25-inch section so the stack of cards sits perfectly inside the cover. If you would like your album to have a ribbon closure, this is the time to get a ribbon. I selected a sheer pink one and put pieces on each side of the covers. I used double-sided tape for this step as well. Now your mini album will have a ribbon between the card and the paper and be able to close. For each open spread, I decorated one side with the examples on the packaging and left the opposite side for a photo.
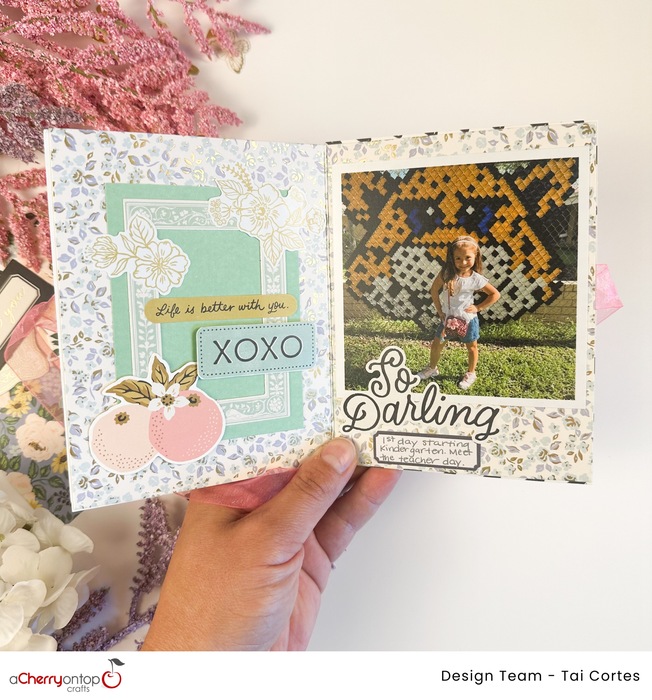
I scraped a few photos I have already printed on my desk of my daughter and my dog and I. Fun photos and a little bit of journaling, make this project simple and sweet. I then go through my Maggie Holmes stash to decorate the cover. I used a combination of chipboard pieces and card stock stickers.
This project is small enough to be given as a gift for Mother’s Day, Father’s Day, or even a birthday. You can customize it how you need it. I hope you use some of your stationery cards for a second look and make a mini album with them.
Products Used:
 Tai Cortes
Hi there! I am Tai and I live in Royal Palm Beach, Florida with my hubby, Miguel, my 6-year-old daughter Valentina, and our two dogs, Maui and Moana. I live in the year-round summertime and I love it. I am a chiropractor by day and a memory keeper/crafter by night. I have been scrapbooking since I was in high school and more consistently since becoming a mom. I love doing 12x12 scrapbook layouts, 12x12 project life, 6x8 family albums, 6x8 daughter albums, travel mini albums, December daily (9 completed years), memory planner, art journaling, and TN layouts. I hope you find my projects inspiring.
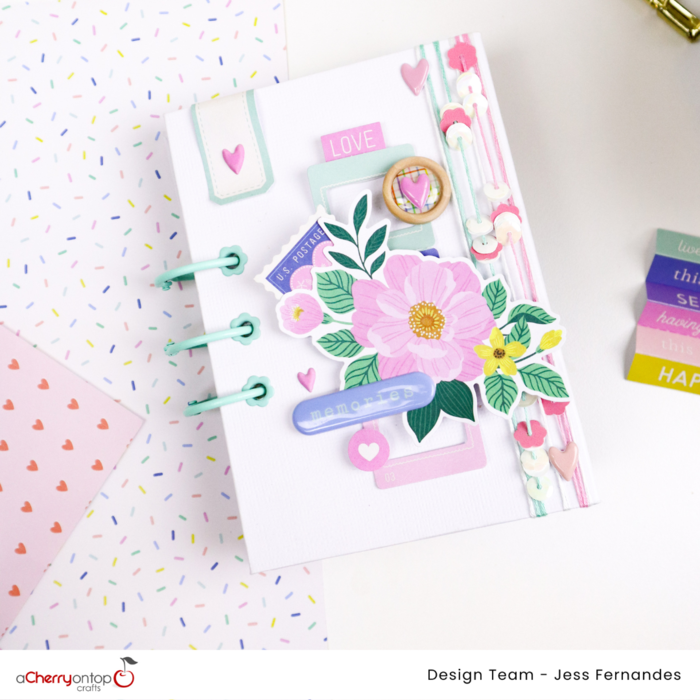
Spring Cards With The Cherry Box
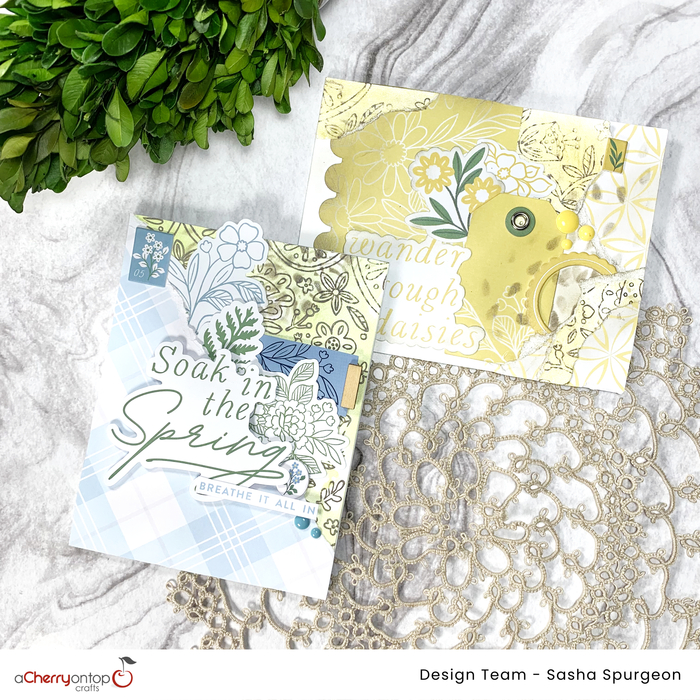 |
Hello everyone! Sasha here, and today, I’m sharing some more inspiration using the Spring Cherry Box!
When I first received the box, I was especially excited to play around with the stencil butters from The Crafter.. |
Butterfly Filled Scrapbook Layout
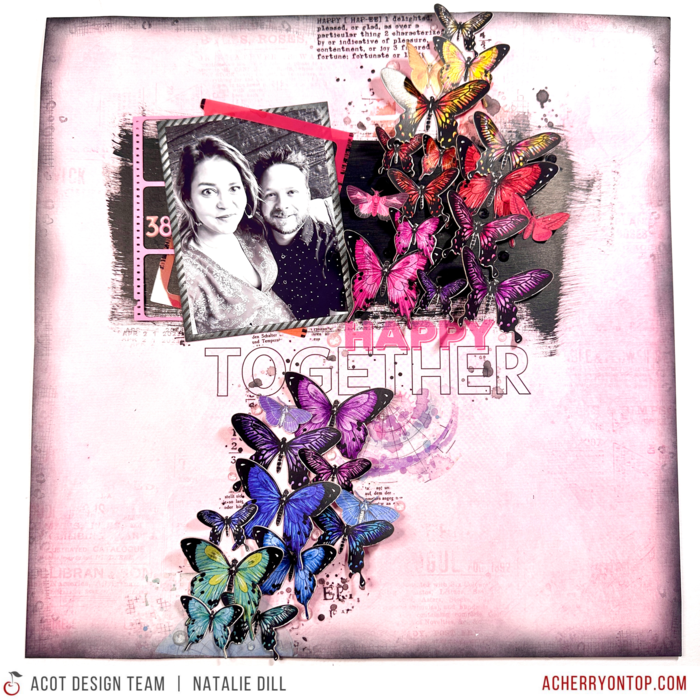 | Hey Cherries! Natalie here today creating a very dimensional page and combining manufacturers for a bold scrapbook look.
The star of the show today is this pack of butterfly die cuts by Aall & Create! This beautiful collection... |
Travel Mini Album With The Poppy & Pear Collection
 |
Hello, dear Cherry blog readers! Today, I'm excited to share with you a very special project I recently created using the wonderfu... |
Winnie The Pooh Mini Album 4 comments
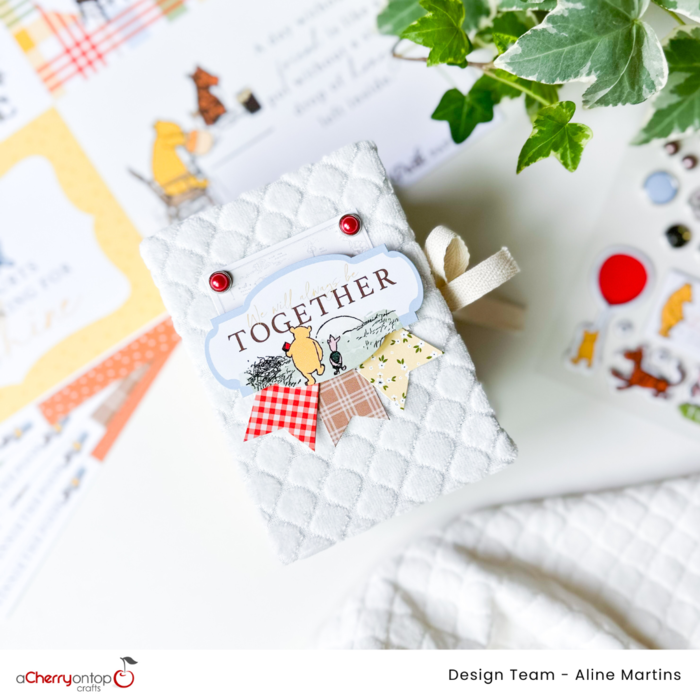 |
Hello Cherries! Have you seen Echo Park's Winnie the Pooh collection? I confess that I couldn't resist when I came across this nostalgic cuteness.
The illustrations of the characters in the retro style, the cla... |
National Scrapbook Day 2024 - Free Online Crop
 |
Come join us for our FREE event to celebrate National Scrapbook Day here at A Cherry On Top Crafts! We will be partying all weekend long (May 3rd-5th) with an online crop, challenges, games, giveaways, and more! You'll find all the action on our |
Be You Art Journal
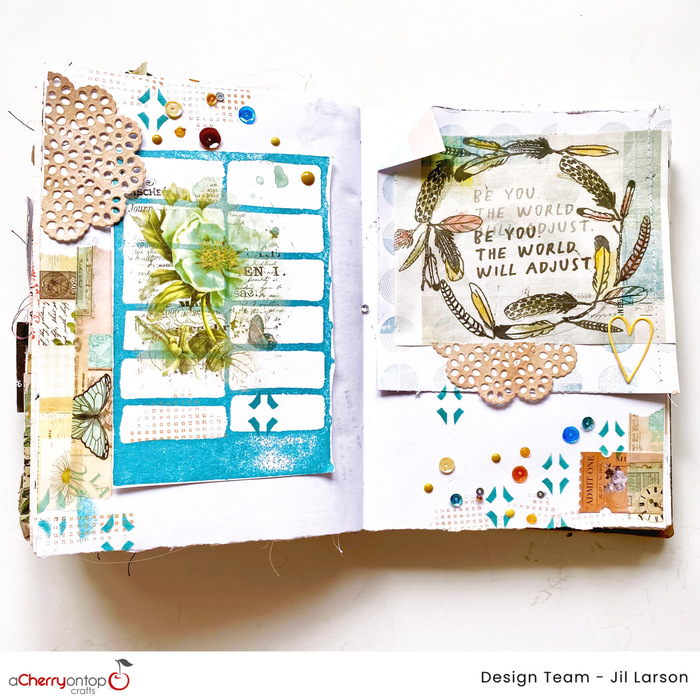 |
So many wonderful supplies available in the A Cherry On Top store this spring! I decided I would simply play with some of my new supplies in my junk journal—thanks for joining me!
My starting point was the wreath builde... |
Disney Memory Planner
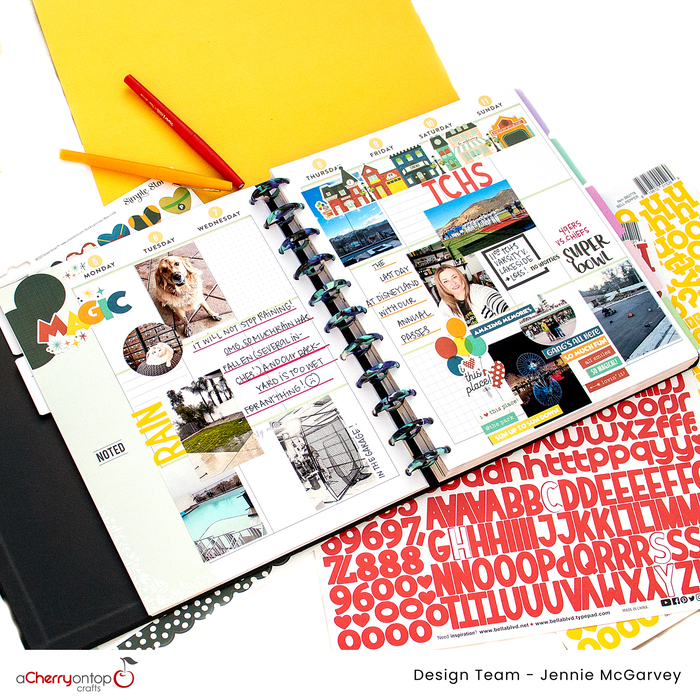 |
Hi, there! It's Jennie McGarvey and I'm looking forward to sharing with you today a perspective on my memory planner. If you've checked out the A Cherry On Top blog before, you know I often share my memory planner layouts. I started using a m... |
Weekly Sketch Challenge 374
|
Need some inspiration for your scrapbooking? Every week we post a brand new sketch challenge for you! Here is this week's sketch challenge, and read below how you can earn Cherry Points.
Post your fin... |
Boho Sunshine Scrapbook Layout
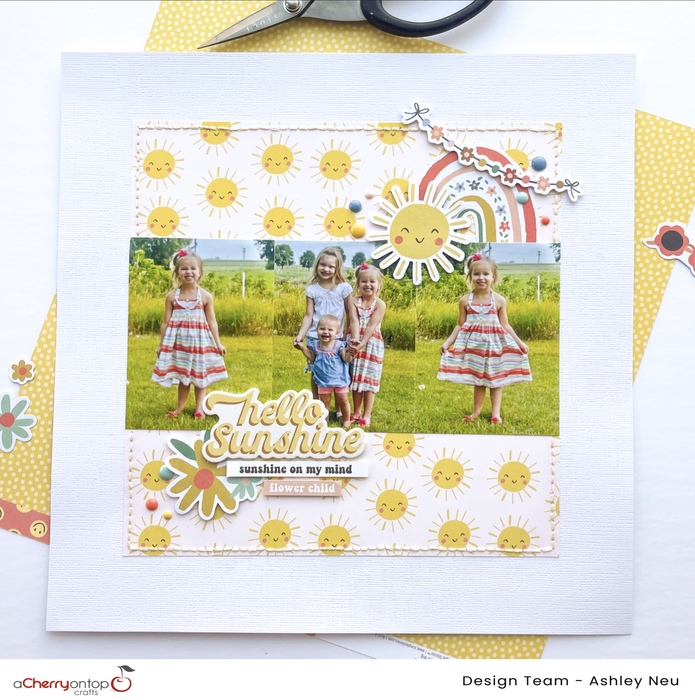 |
Hello friends! It’s Ashley Neu here to share my next ACOT Design Team project. I hope you are having a good week so far! Today, I am sharing a layout featuring the Boho Sunshine C... |
Travel Album Scrapbook Page 3 comments
 |
Good morning Cherries! Suzanna here today to share a spread from a travel album that I created using a mix of collections for our most recent travel adventures. Spring in the Southwest is so different from what I know. I captured lots of Spring b... |
To A Friend - Handmade Card
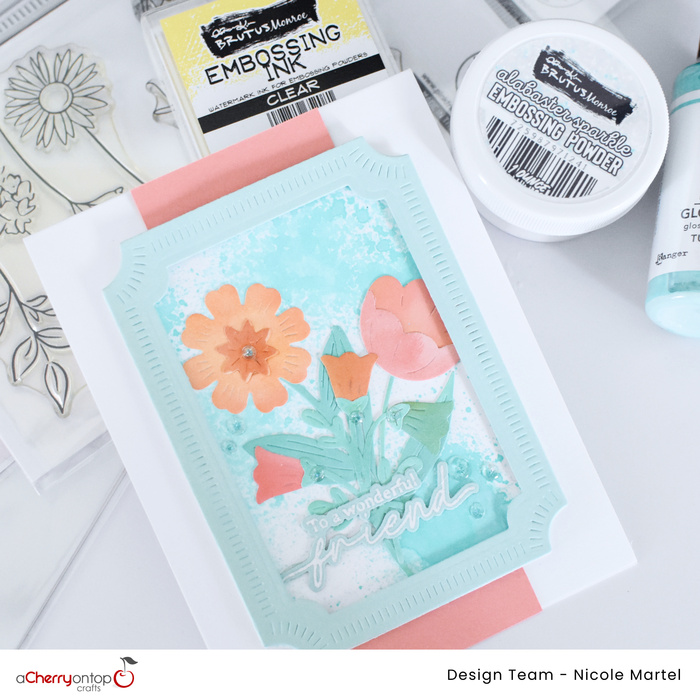 |
Happy Tuesday friends! I needed to make a few cards this month for my friends, and I decided to create a white embossed sentiment for one of them. This card turned out cute with all the mixed media…I just love it.
|
Be You Sunshine Scrapbook Layout
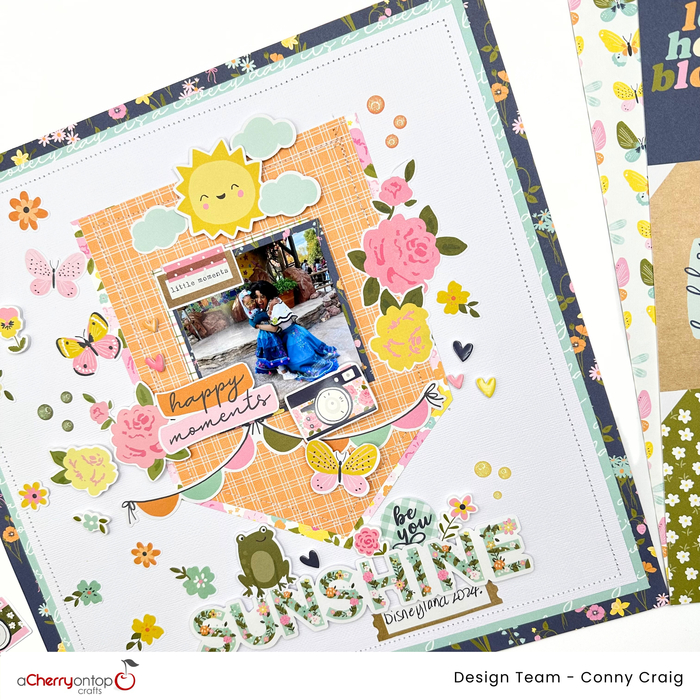 |
Hello there Cherries! |
Next Page
Page 1 of 239
- In Full Bloom Scrapbook Layout
- Weekly Sketch Challenge 375
- Making An Album Out Of A Card Kit
- Spring Cards With The Cherry Box
- Butterfly Filled Scrapbook Layout
- Travel Mini Album With The Poppy & Pear Collection
- Winnie The Pooh Mini Album
- National Scrapbook Day 2024 - Free Online Crop
- Be You Art Journal
- Disney Memory Planner
- Weekly Sketch Challenge 374
- Boho Sunshine Scrapbook Layout
- Travel Album Scrapbook Page
- To A Friend - Handmade Card
- Be You Sunshine Scrapbook Layout
- Tutorials - Scrapbooking (542)
- Contests & Challenges (643)
- Cherry Box (141)
- Announcements (396)
- Tutorials - Planners & Journals (102)
- Tutorials - Paper Crafting (247)
- Home Decor (20)
- DIY Crafts (8)
- Contests & Challenges Winners (3)
- Tutorials - Painting (32)
- Tutorials - Crafts (21)
- Tutorials - Needle Crafts (11)
- Product Features (68)
- Tutorials - Stamping (20)
- Featured Guests (241)
- Tutorials - Photography (12)
- Tutorials - Hybrid (18)
- Videos (97)
- Creative Team Reveals (781)
- Creative Team Spotlight (65)
- Tutorials - Digital (64)
- 2024 (135)
- April (30)
- In Full Bloom Scrapbook Layout
- Weekly Sketch Challenge 375
- Making An Album Out Of A Card Kit
- Spring Cards With The Cherry Box
- Butterfly Filled Scrapbook Layout
- Travel Mini Album With The Poppy & Pear Collection
- Winnie The Pooh Mini Album
- National Scrapbook Day 2024 - Free Online Crop
- Be You Art Journal
- Disney Memory Planner
- Weekly Sketch Challenge 374
- Boho Sunshine Scrapbook Layout
- Travel Album Scrapbook Page
- To A Friend - Handmade Card
- Be You Sunshine Scrapbook Layout
- Spring Cards Featuring Lawn Fawn
- April Eclipse Memory Planner
- Mini Album With The Spring Cherry Box
- Weekly Sketch Challenge 373
- Springtime Greetings Cards
- You Are My Sunshine Art Journal
- Simple Stories Fresh Air Sn@p Album
- Blossom Scrapbook Layout
- Happy Together Scrapbook Layout
- Spring Tags
- The Simple Things - Scrapbook Layout
- Weekly Sketch Challenge 372
- Sunny Blooms Scrapbook Layout
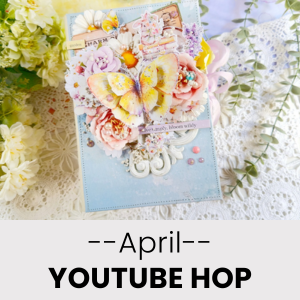
- April YouTube Hop
- Hidden Journaling Scrapbook Layout
- March (33)
- February (35)
- January (37)
- 2023 (336)
- 2022 (320)
- 2021 (287)
- 2020 (203)
- 2019 (115)
- 2018 (31)
- 2017 (23)
- 2016 (46)
- 2015 (75)
- 2014 (70)
- 2013 (90)
- 2012 (144)
- 2011 (277)
- 2010 (314)
- 2009 (285)
- 2008 (248)
- 2007 (166)
- 2006 (248)
- 2005 (142)
- 2004 (21)
- 0000 (1)


